Spacebar
I got involved with Spacebar after meeting the founders, Michael and Jack, through an event put on by UW Transcend in mid 2020. I later reached out to them about joining the team as they were looking for developers and I was looking to gain more experience. In additon, I thought what they were building seemed like it could solve a real problem many college students were experiecing at the time.
Table of Contents
Learning
Prior to working on this app, I only had a little experience using React so I knew there would be a substancial learning curve at first. Adding to that a new codebase and new technologies like TypeScript, Redux, and Docker required me to intially spend some time becoming more familiar with the techstack we were using. I started off by reading documentation, doing/watching tutorials, and looking at code written by others for the first month.
Some of the resources I found the most helpful were:
Fundamentals of Redux provided a quick intro to Redux and state management. The React TypeScript Docs were helpful for learning the basics of TypeScript and how to use it with React. The React Native Tutorial showed how to set up a development environment with Expo as well as debugging, UI, and styling.
Development Environment
Most of my development time was spent inside of VS code as I most familiar with is and there are a bunch of helpful React and TypeScript extensions. I also used Docker to run the backend locally.
I used Ngrok to create a proxy for my phone to access the backend that was running on my computer. Then I used Expo on my mobile device to test the functionality and layout of the screens I was working on. In addition we used Jest and Cypress to run automated testing.
React Native Development
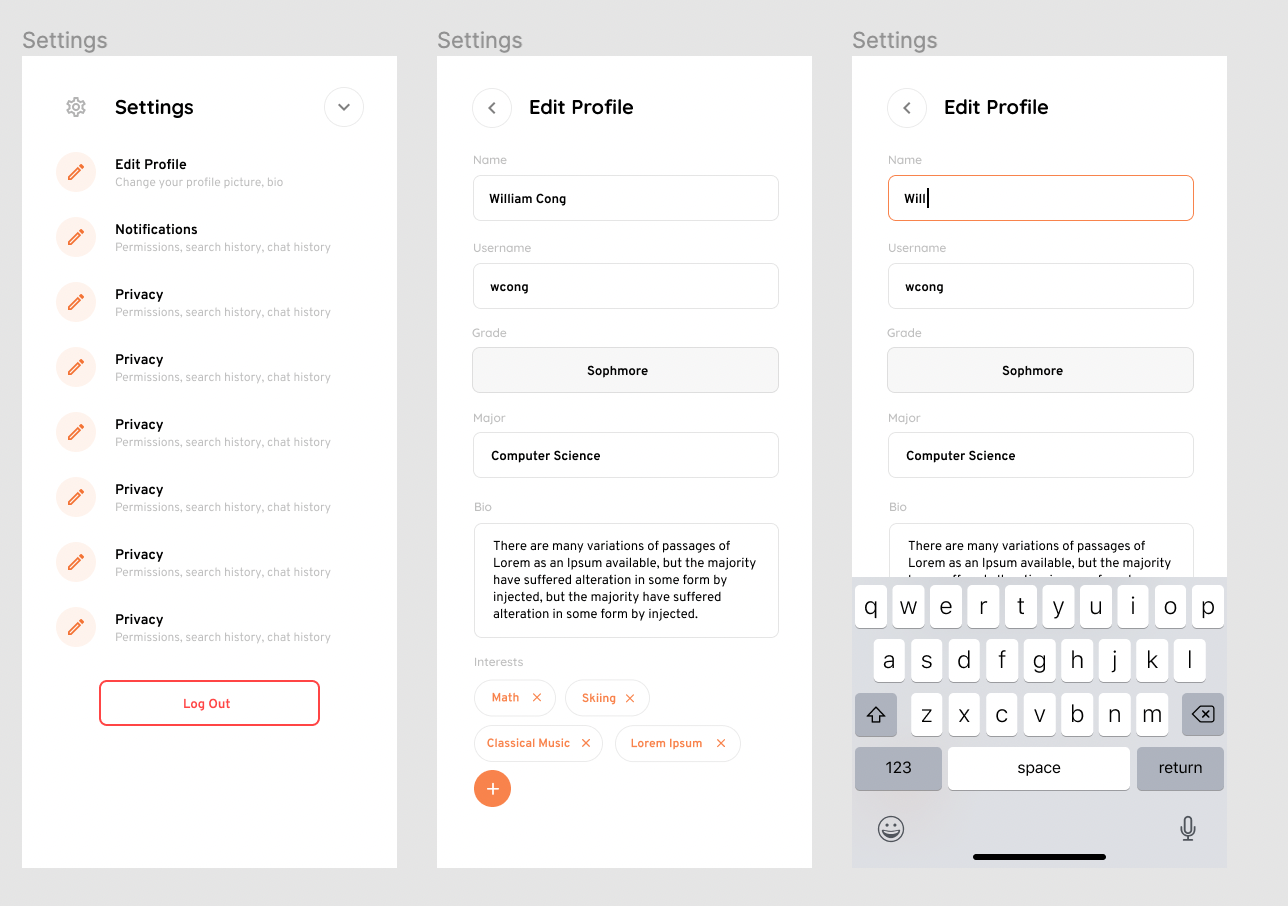
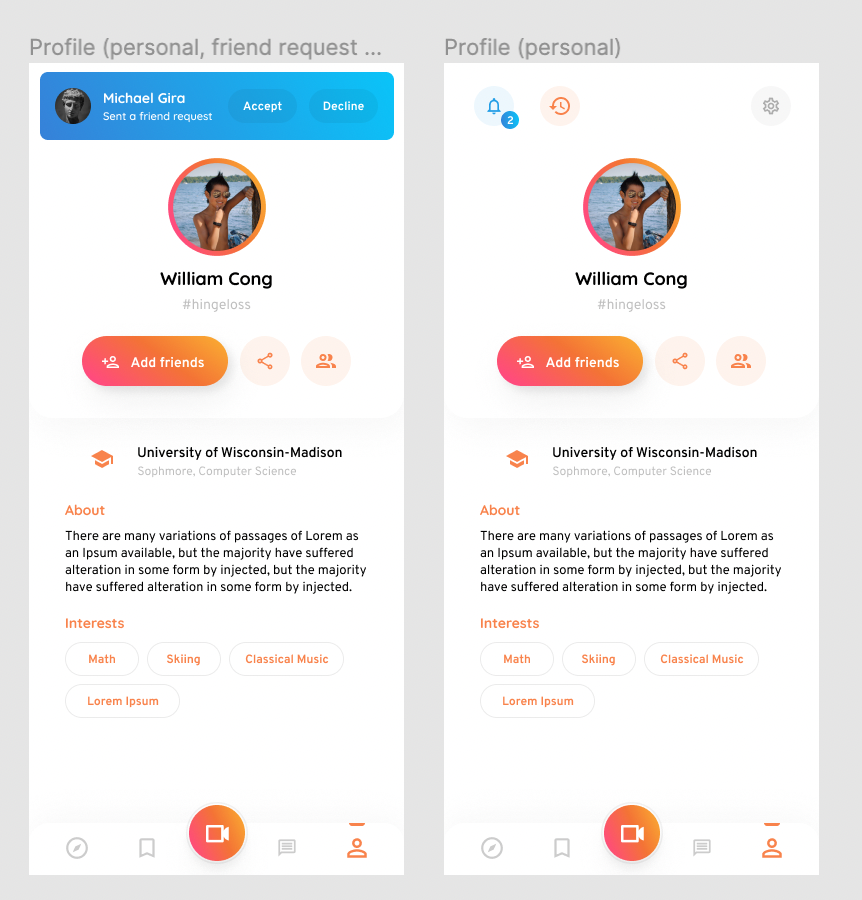
After becoming familiar with the codebase and getting my local development environment set up, I was assigned with building out the user profile and settings screen. The profile screen needed to display user data like name, school, and grade. For the settings screen, a user needed to be able to view and update data, as well as view extra information like policies or the app version.
Our designer had already built out a prototype using Figma so I used that for reference when buildings the UI.
We used React Native so we could develop a mobile and web app at the same time while taking advatange of shared components and styles. In addition we used TypeScript so we could catch more errors during development.
I started with a mobile first approach as it is normally easier to design for smaller screens intially and then larger ones.
When building out both the user profile and the settings screen, I mostly followed the steps outlined in the React docs article, Thinking in React, which are:
- Break The UI Into A Component Hierarchy
- Build A Static Version
- Identify The Minimal (but complete) Representation Of UI State
- Identify Where Your State Should Live
Breaking the UI into Components and Building a Static Version
For step 1, Figma did most of the work for me as there were already a component Hierarchy layed out due to the way Figma organizes frames.
For step 2, I started off by just getting the screen to look as close as possible to the mockup. Then I broke it down into reusable components. While making everything a component in your UI can feel like a lot of work upfront, it pays off later as components are reused and the UI becomes more complex. The React Docs have a good section about the concept, and a good general rule is to make anything a component that is used more then once in the UI.
Identifying UI State and where it should Live
For step 3, the only state that needed to be shown was user data which consisted of the following fields in the user interface.
export interface JsonUser {
	id: string;
	email: string;
	givenName?: string;
	familyName?: string;
	gender?: Gender;
	grade?: Grade;
	collegeMajor?: string;
	bio?: string;
	profilePicture?: string;
	handle?: string;
	school?: JsonSchool;
	communities: JsonCommunity[];
	createdAt: string;
	updatedAt: string;
	isAdmin: boolean;
}
The user profile showed the users name, handle, school, grade, major, and bio. These fields were all able to be updated in the settings screen as well.
For step 4, we used Redux to store global state throughtout our app. This allowed us to access user information from anywhere in the app without having to pass props down to components multiple times. Redux has some really helpful DevTools that make debugging a lot easier.
Conclusion
Overall, I am grateful to have worked on this team and gained more experience with frontend and backend devlopment while getting to know some very talented people.